Computational Couture
Introduction to Grasshopper
I did a few things before even booting up Grasshopper, first of all I Installed a bunch of popular and pratical plugins that I knew I would like.
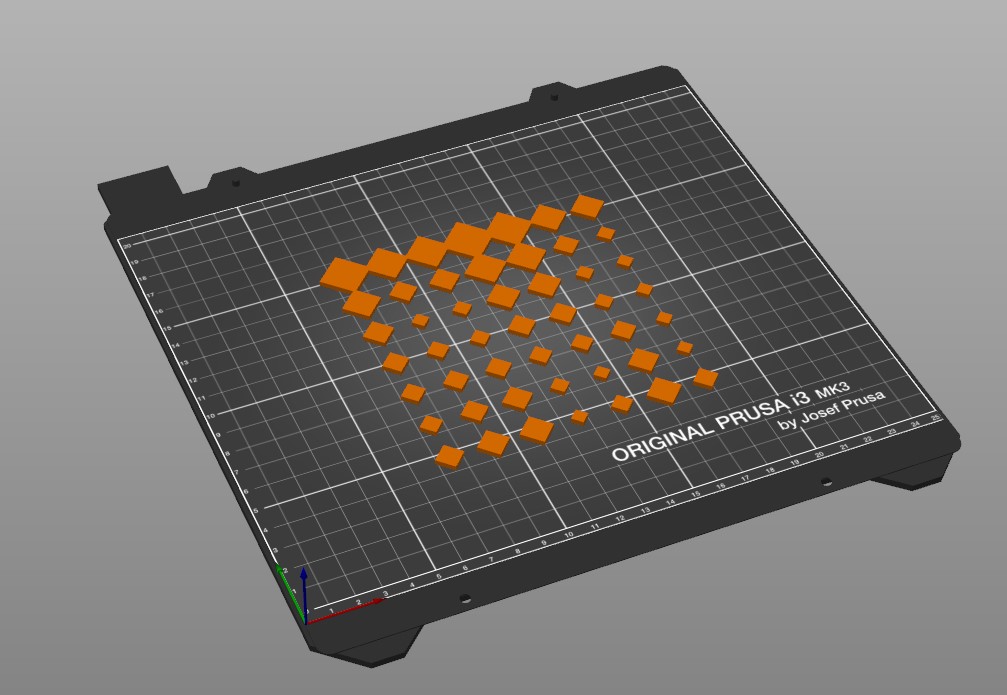
Once I had my pluggins Installed, I went ahead and did my first grasshopper design. I wanted to do a simple attractor curve that would change the radius of polygons on a rectangular grid depending on the distance between the center of those polygons relative to the curve.
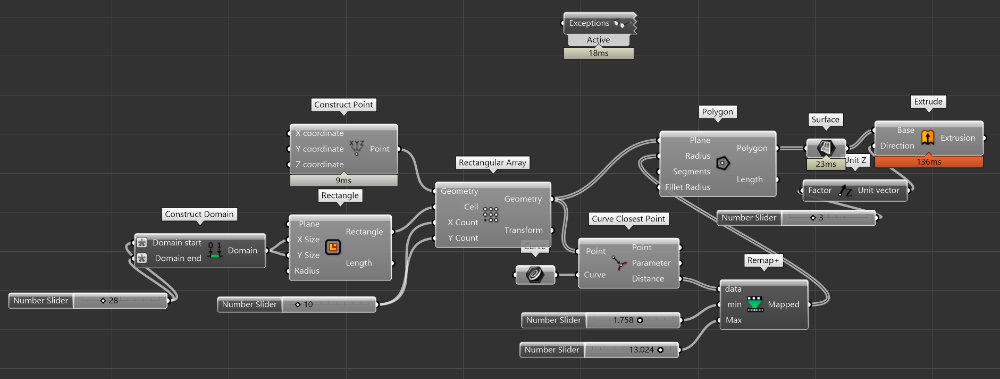
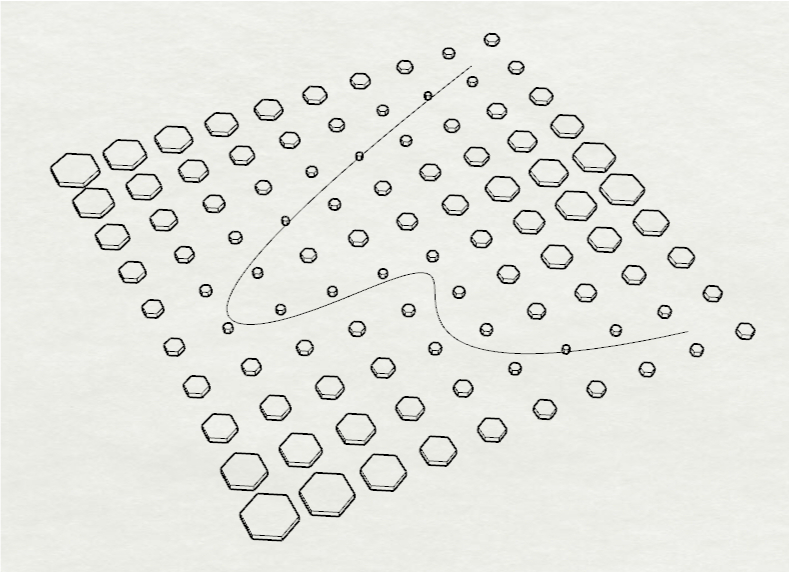
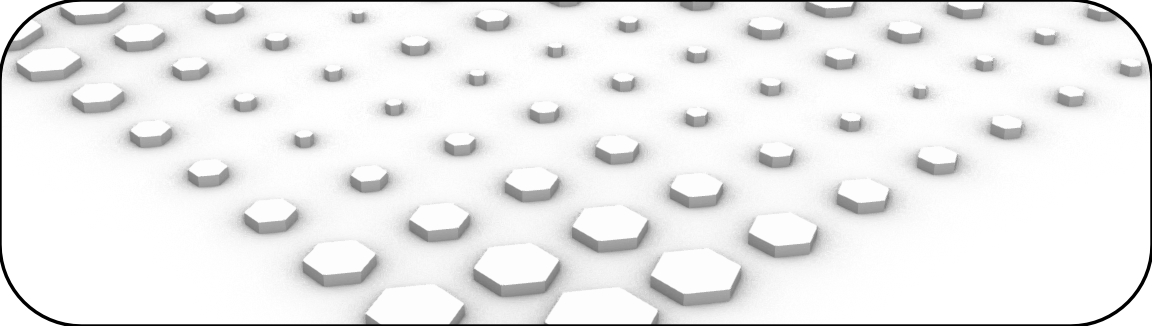
As you can see here, the design is pretty simple, all I do is generate an rectangular array of points on wich I positioned polygons. Inside Rhino, I also create a simple spline that I then adress in my grasshopper program as a curve. Then I use a module called Curve Closest Point to find the closest point on my curve from my rectangular array. I then remap the distance from my points in my array and the closest point from the curve to a new domain that is fit between a minimum and a maximum value. These new values then serve as the data for my polygons radius. So that the closer the polygon is from the curve, the smaller it will be. Finally I extrude everything so that I have a 3D model.
The whole design is parametric since you can use input slider to change variable, instead of using defined, fix numbers. This perticular script is very straight forward and we don't have tons of control but we still can manage the dimension of our array and the number of points inside of it,the domain of the minimum and maximum radius of our polygon, and the value of our extrusion. The curve is not parametric since it's set in rhino and need to be manually updated for different itteration. The curve could have easily be created inside grasshopper with parametric definition, this would have been a better design choice.
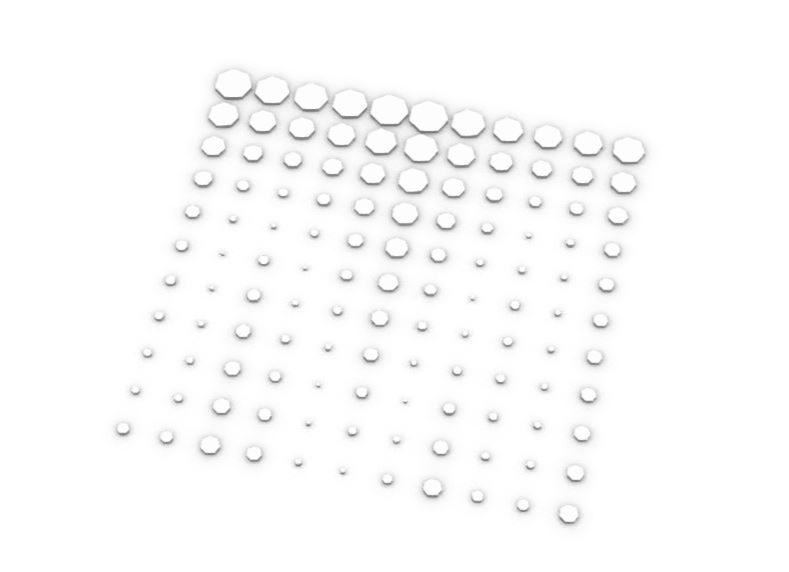
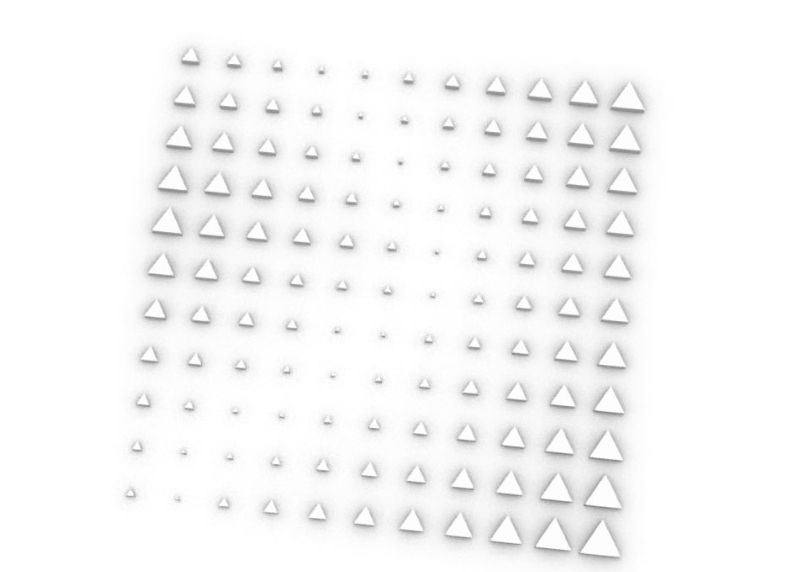
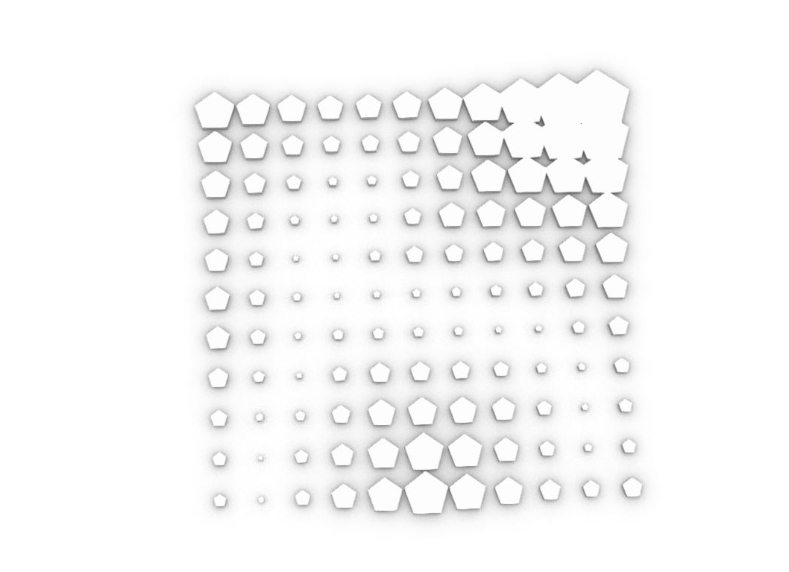
From there, you can easily iterate your design and create different kind of attractor from changing your polygon, or your curve. Here are some exemple all coming from the same script.
Once your design is "final" you need to bake your grasshopper simulation into Rhino so that It becomes an actual model. From there, you can modify the model from inside of Rhino, Grasshopper does not impact the model once it's bake.
Slicing a model
The slicing software that I personnaly uses is PrusaSlic3r, it is an open-source software that comes from Prusa Research Lab. It has all kind of very interesting featured such as customs support and color changes. There are multiple slicing software and the most important thing is that you find one that fits your needs.
To import my 3D model into my slicer, I need to export it from Rhino into an STL format. To do so, all you have to do is select the model you want to export and go into File>exportselected.
Once in your Slicer you can import your .STL file and positioned it unto your bed, make sure you are using the right 3D printer profile, In my case, I will be printing with a Prusa i3 MK3.
One you have your model imported into the slicer, you can do some small modification such as the scale and position of the model onto your print bed. You can modify your setting in a very detailled way or using the simplified interface for a quick print. The main thing you have to know about programming a print are these parameters:
I normally use a 0.15mm layer height for a good quality print that still has realist time constraint. Since I will be printing with PLA, I set my temp to 215 and my bed to 60 degree celcius. Since I will be printing on textile, I don't want to use any kind of brim,skirt or raft and I also don't need any support.
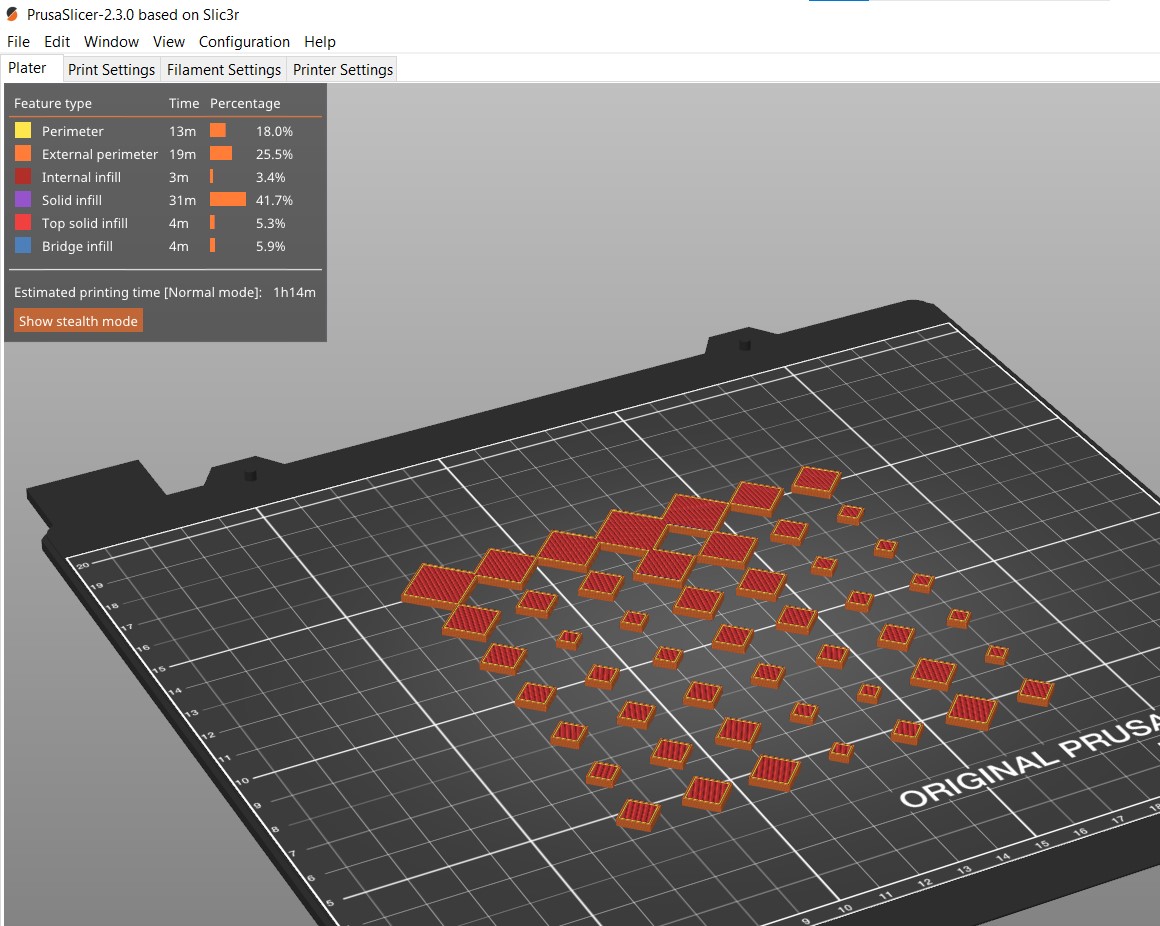
Once this is all done, you can export the G-Code. The G-Code is the language the machine is using to interprete your instruction.
3D Printing
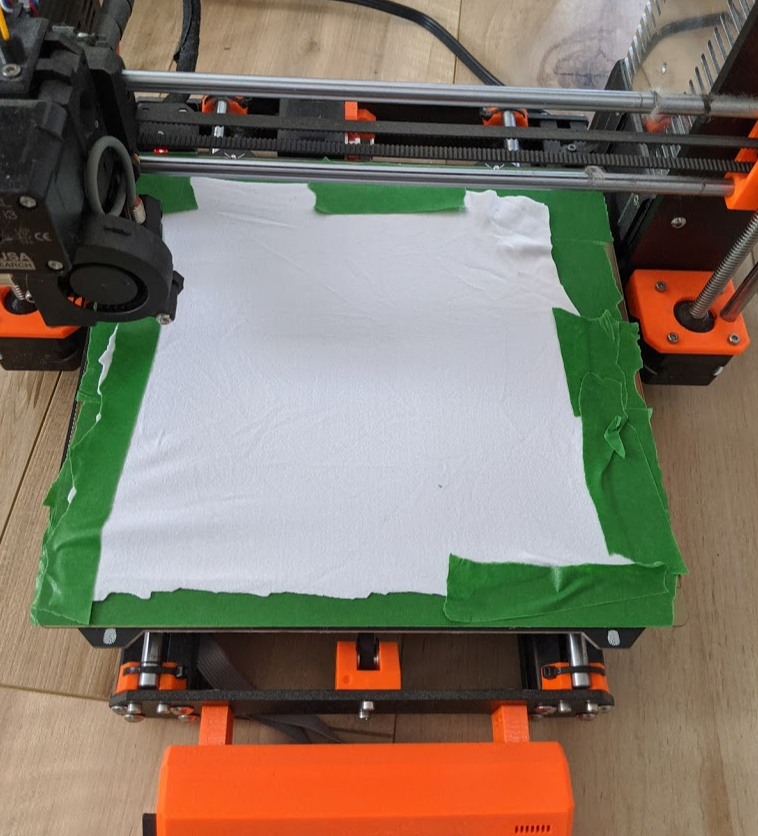
The next challenge for this assigment will be to place the fabric onto the 3d printer bed, I decided to try to tape it directly on it. The fabric has to be strech equally so that the print head dosen't pull onto it while deposing it's plastic.
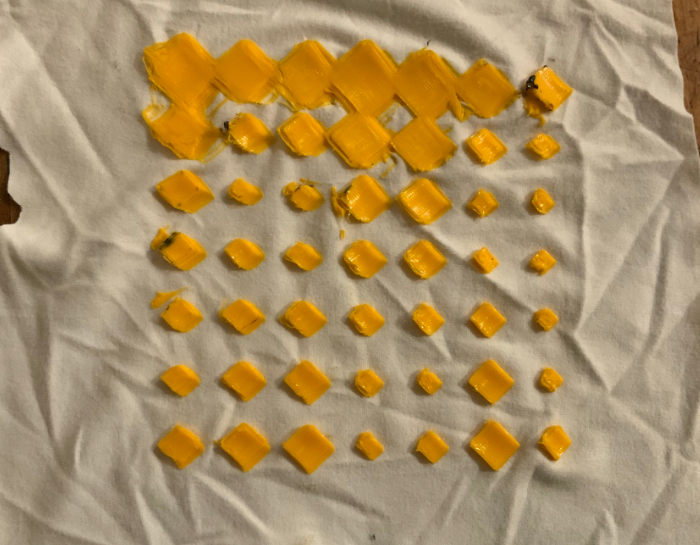
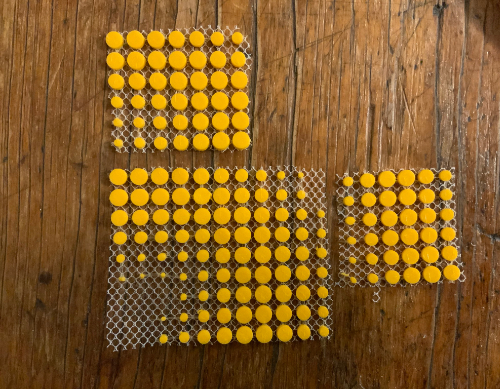
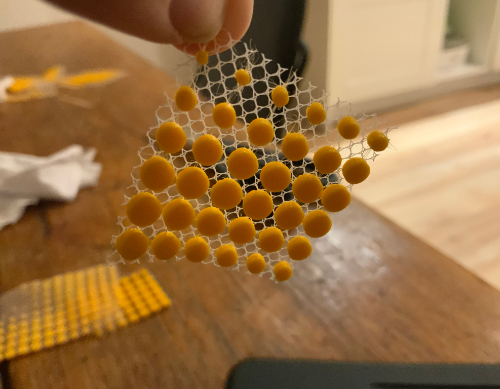
I did a second test using tulle and the result were wayy better, I did some tiny sample just to see how small my print could go while still adhering to the textile, here are some exemples: